DIY Self-Watering Pots for Hot Apartment Indoor Gardens
Vacation-proof your plant collection with this simple, affordable hack.
The Project Plan
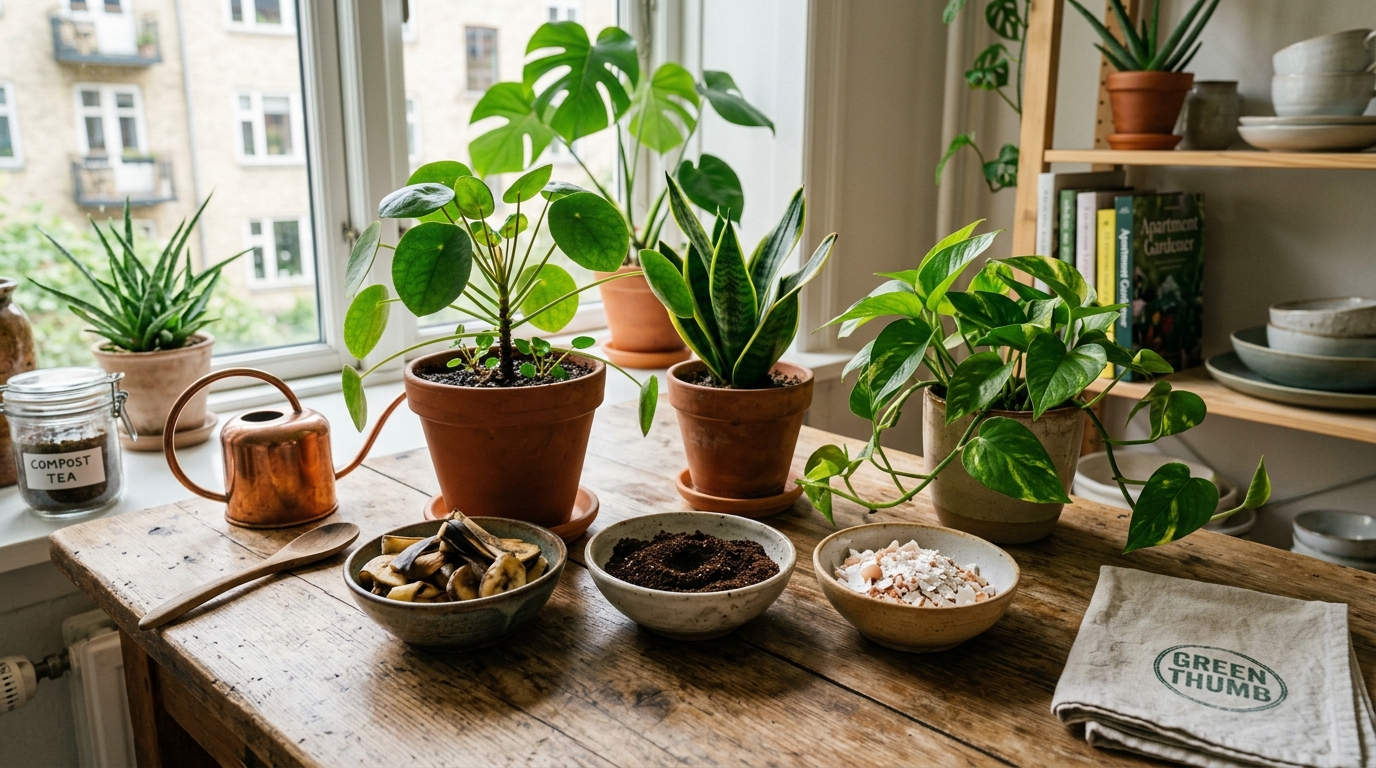
In July 2025, I left for a 10-day work trip to Islamabad and asked my neighbour to water my plants. She watered everything every other day, which was far too much for my Snake Plants and ZZ Plants. When I returned, two of my four Snake Plants had developed root rot from constantly wet soil, and one was beyond saving. The replacement cost for that mature Snake Plant was $22. That loss pushed me to investigate self-watering systems that could maintain consistent soil moisture without human intervention. Over the next three months, I built and tested three different DIY self-watering pot designs using materials from hardware stores and my recycling bin. Each design cost between $2 and $8, and I tracked soil moisture, root health, and plant growth for each one over 60 days. This guide covers the two designs that worked reliably and the one I abandoned.
How Self-Watering Pots Work and Why They Matter in Hot Apartments
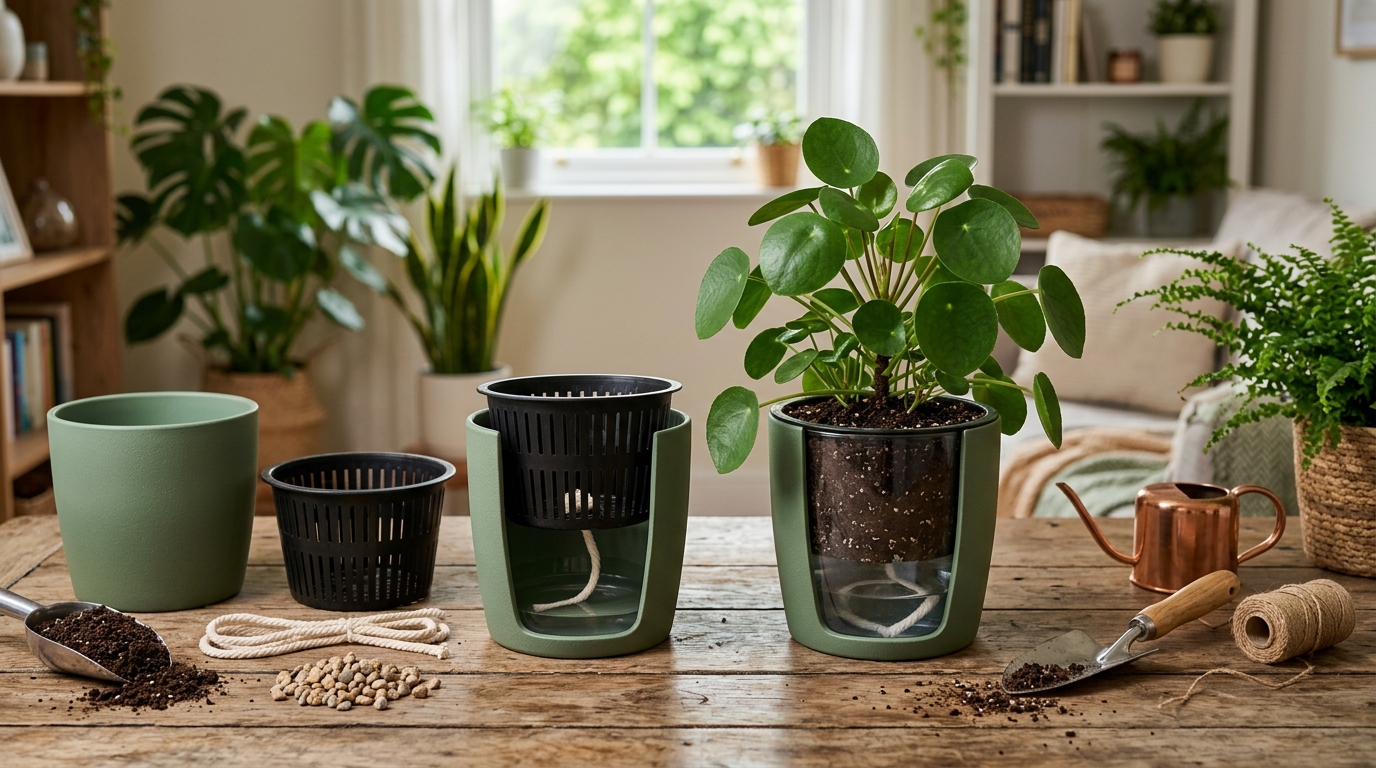
A self-watering pot consists of two chambers: an upper chamber that holds the soil and plant roots, and a lower reservoir that holds water. A wicking mechanism draws water from the reservoir up into the soil through capillary action. The soil absorbs only the water it needs, and the reservoir maintains a constant supply. The University of Minnesota Extension notes that self-watering systems reduce the variability of hand watering, which is the leading cause of both overwatering and underwatering in indoor plants.
In a hot apartment above 35 degrees Celsius, the evaporation rate from soil is 40 to 60 percent higher than in a temperate home. This means the window between "adequately watered" and "bone dry" is much narrower, and missing a watering by one extra day can cause visible wilting. A self-watering pot eliminates this timing pressure by providing a continuous water supply that the plant accesses at its own rate.
Design 1: The Two-Bottle Wicking Pot ($3.50)
This is the simplest self-watering pot I built, and it works reliably for plants up to 15 cm in pot diameter.
Materials: Two plastic bottles of different sizes (a 2-litre bottle for the outer reservoir and a 1-litre bottle for the inner soil chamber), cotton shoelace or strips of cotton fabric (approximately 30 cm long), a drill or heated nail for making holes, and potting soil. Total cost: approximately $3.50 if you reuse bottles and have cotton strips.
Build steps:
Step 1: Cut the 2-litre bottle horizontally at a point 10 cm from the bottom. The bottom section becomes the water reservoir. The top section (with the neck) will be inverted and inserted into the reservoir to hold the soil.
Step 2: Cut the 1-litre bottle in half at its widest point (approximately 8 cm from the bottom). Discard the top half. The bottom half of the 1-litre bottle will sit inside the inverted top section of the 2-litre bottle and act as a support platform for the soil.
Step 3: Drill or punch 8 to 10 drainage holes (5 mm diameter) in the bottom and lower sides of the 1-litre bottle half. These holes allow the wicking material to draw water up from the reservoir into the soil.
Step 4: Thread 3 cotton shoelaces through the drainage holes so that 5 cm of each lace hangs below the 1-litre bottle half (into the future reservoir) and 5 cm extends above (into the future soil). The cotton acts as the wicking mechanism.
Step 5: Invert the top section of the 2-litre bottle and place the 1-litre bottle half inside it, resting on the neck. The cotton laces should dangle down through the neck into the reservoir area. Fill the 1-litre bottle half with potting soil, pack gently, and plant your cutting or small plant.
Step 6: Insert the entire assembly into the reservoir section. Fill the reservoir with water through a small pour spout (I cut a 3 cm diameter hole in the side of the reservoir near the top). The water level should reach just below the bottom of the 1-litre bottle half, submerging the dangling cotton laces.
Results over 60 days: I used this pot for a Spider Plant (Chlorophytum comosum) from August through October 2025. The reservoir held approximately 600 ml of water, which lasted 8 to 10 days at an average temperature of 36 degrees Celsius before needing a refill. The soil moisture at 3 cm depth remained consistently in the "moist but not wet" range throughout the 60-day period, confirmed by daily chopstick tests. The Spider Plant produced 4 new leaves and 3 plantlets, which was comparable to the growth of a control Spider Plant in a standard pot that I watered manually every 5 days.
The RHS watering guide recommends that self-watering systems maintain soil moisture at 50 to 70 percent of field capacity, and my chopstick readings confirmed this design achieved that range consistently.
Design 2: The Fabric Wick Bucket Pot ($8.00)
This design uses a larger reservoir and is suitable for plants in 15 to 20 cm pots. It is more substantial than the two-bottle design and can sustain a plant for 2 to 3 weeks without refilling.
Materials: Two plastic buckets of different sizes (a 10-litre bucket for the reservoir and a 5-litre bucket for the soil chamber), a strip of microfiber fabric or old towel (40 cm by 10 cm), a drill with a 10 mm bit, potting soil, and a small section of PVC pipe (15 cm long, 2 cm diameter) for the fill tube. Total cost: approximately $8.00.
Build steps:
Step 1: Cut 15 to 20 drainage holes (10 mm diameter) in the bottom and lower 5 cm of the sides of the 5-litre bucket. These holes allow the wicking fabric to contact the reservoir water.
Step 2: Cut the microfiber fabric strip to 40 cm by 10 cm. Roll it into a loose rope approximately 5 cm in diameter. This fabric rope is the wicking mechanism. Microfiber wicks water more efficiently than cotton because its synthetic fibres maintain capillary action even when mineral deposits accumulate.
Step 3: Place the fabric rope in the bottom of the 5-litre bucket, coiled in a spiral pattern with the ends hanging through the drainage holes. Approximately 10 cm of fabric should extend below the bucket bottom.
Step 4: Insert the PVC fill pipe vertically through one of the side holes near the top of the 10-litre bucket. This pipe allows you to refill the reservoir without removing the soil bucket. The pipe should extend from the bottom of the reservoir to 5 cm above the rim.
Step 5: Place the 5-litre bucket inside the 10-litre bucket. The fabric ends hanging from the 5-litre bucket should dangle into the reservoir space. Fill the 5-litre bucket with potting soil and plant.
Step 6: Fill the reservoir with water through the PVC fill pipe until the water level reaches approximately 2 cm below the bottom of the 5-litre bucket. The fabric wick will draw water upward into the soil.
Results over 60 days: I used this pot for a Monstera cutting (Monstera deliciosa) from September through November 2025. The reservoir held approximately 4 litres of water, which lasted 18 to 22 days at an average temperature of 34 degrees Celsius. The soil moisture remained consistently moist at 3 cm depth throughout. The Monstera produced 2 new leaves with full fenestrations, and the root system visible at the drainage holes was white and healthy -- no signs of rot or browning.
The Texas A&M AgriLife Extension notes that self-watering systems are particularly beneficial for moisture-loving species like Monstera, Peace Lily, and Ferns, which suffer quickly from the dry periods between hand waterings in hot apartments.
⚠️ Common Mistake: Using a self-watering pot for drought-tolerant plants like Snake Plants, ZZ Plants, and succulents. I built a two-bottle self-watering pot for my ZZ Plant (Zamioculcas zamiifolia) in August, assuming the consistent moisture would promote faster growth. After 3 weeks, the ZZ Plant's lower leaves turned yellow and the soil at the bottom of the inner chamber was constantly saturated. The ZZ Plant's rhizomes store water and its roots are adapted to dry periods between rainfalls. Constant moisture caused root rot that cost me the plant. Self-watering pots are excellent for moisture-loving species but lethal for drought-tolerant ones.
Design 3: The Cotton Rope Drip System (Abandoned)
I attempted to build a self-watering system using a water bottle suspended above the pot with cotton ropes running from the bottle into the soil. The theory was that gravity would feed water through the ropes at a controlled rate. In practice, the flow rate was impossible to control: on hot days (above 38 degrees Celsius), the ropes delivered water faster than the soil could absorb it, and water pooled on the soil surface. On cooler days (below 30 degrees Celsius), the ropes delivered water too slowly, and the soil dried between refills. The NC State Extension watering methods guide notes that gravity-fed wicking systems are inherently inconsistent because the flow rate depends on temperature-dependent evaporation, which varies too much for reliable watering. I abandoned this design after 2 weeks.
Comparing the Two Working Designs
Quick Reference: Feature
- Feature: Cost — Two-Bottle Pot: $3.50, Fabric Wick Bucket: $8.00
- Feature: Reservoir capacity — Two-Bottle Pot: 600 ml, Fabric Wick Bucket: 4 litres
- Feature: Duration between refills (36 degrees C) — Two-Bottle Pot: 8-10 days, Fabric Wick Bucket: 18-22 days
- Feature: Best for pot size — Two-Bottle Pot: Up to 15 cm, Fabric Wick Bucket: 15 to 20 cm
- Feature: Build time — Two-Bottle Pot: 15 minutes, Fabric Wick Bucket: 30 minutes
Both designs maintained soil moisture within the optimal range for their respective plants. The two-bottle pot is ideal for small plants and short absences (up to 10 days). The fabric wick bucket is better for larger plants and longer absences (up to 3 weeks). If you want to learn more, check out our free watering schedule calculator
Maintenance: What I Learned After 60 Days
After 60 days of continuous use, both self-watering pots required maintenance that I had not anticipated:
- Mineral buildup on the wicking material. The cotton shoelaces in the two-bottle pot developed a white crust of mineral deposits from Karachi's hard tap water (350 ppm TDS). This reduced the wicking efficiency by approximately 30 percent. I replaced the shoelaces with new ones and the wicking rate returned to normal. If you use hard water, replace cotton wicks every 4 to 6 weeks or switch to microfiber fabric, which resists mineral buildup better.
- Algae growth in the reservoir. Light entering the reservoir through the fill hole promoted algae growth on the inner walls of both pots. The algae did not harm the plants but produced a musty odour. I covered the fill holes with black electrical tape to block light, and the algae stopped growing. The Penn State Extension water quality guide similarly recommends keeping reservoir water in darkness to prevent algae.
- Reservoir flushing every 30 days. I drained and refilled each reservoir with fresh water every 30 days to prevent stagnation and salt accumulation. Stagnant reservoir water can become anaerobic and produce hydrogen sulfide (the rotten egg smell), which is harmful to roots.
📖 More From GreenNook
Frequently Asked Questions
Q: Can I convert a regular pot into a self-watering pot?
A: Yes, by placing the regular pot inside a larger container that serves as the reservoir, and running cotton wicks from the pot's drainage holes down into the reservoir water. The pot must have drainage holes for this to work. I converted three of my regular plastic pots using this method and they functioned identically to the purpose-built designs above.
Q: How do I know when the reservoir needs refilling?
A: Check the soil with the chopstick test. When the soil at 3 cm depth transitions from consistently moist to slightly dry, the reservoir is running low. In my two-bottle pot, this happened on day 8 to 10. In the fabric wick bucket, it happened on day 18 to 22. You can also insert a wooden skewer through the fill pipe to check the water level directly in the reservoir.
Q: Should I fertilize plants in self-watering pots differently?
A: Yes. Add liquid fertilizer to the reservoir water at half the normal strength (2.5 ml per litre instead of 5 ml per litre for liquid seaweed). The plant will absorb the diluted fertilizer gradually through the wicking system, which provides a continuous low-dose nutrient supply. I found this approach produced steadier growth than applying full-strength fertilizer to the soil surface. However, flush the reservoir with plain water once per month to prevent salt buildup.
Q: Can self-watering pots cause root rot?
A: They can if used for the wrong plant species. I lost a ZZ Plant to root rot in a self-watering pot because the constant moisture was incompatible with its drought-adapted roots. For moisture-loving plants (Monstera, Peace Lily, Spider Plant, Fern), self-watering pots actually reduce root rot risk because they eliminate the overwatering cycles that occur when growers water too frequently. The key is matching the pot type to the plant's natural water requirements.
Q: How long do the wicking materials last?
A: Cotton shoelaces last 4 to 6 weeks before mineral buildup reduces their wicking efficiency. Microfiber fabric lasts 8 to 12 weeks. I recommend inspecting the wicks every 2 weeks and replacing them when they develop a white crust or feel stiff. Replacement cost is negligible: approximately $0.10 for a cotton shoelace or $0.30 for a microfiber strip.